Compiling WLED
You want to add custom features to WLED, use non-default pins, or add in a usermod? You've found the right place!
WLED has come to rely on so many dependencies in the latest versions that building with Visual Studio Code and its PlatformIO (PIO) extension is the recommended way. It will install the ESP Arduino core, all the required libraries and the correct compilation settings for you automatically. The Arduino IDE is no longer recommended.
If you don't want to change the code but only add some compile options and/or usermods, you can use the bot on Discord or compile with just a few clicks using this unofficial web-based WLED compiler. Using it, you can download the resulting .bin file directly or install via USB using the built-in web-based installer.
Preparations
- Make sure Git client is installed on your system. If it isn't, you can get it here.
- Also make sure that you have Node.js 20 or higher installed.
- Download the WLED source code by executing
git clone https://github.com/wled/WLED.gitin some folder. (You can also use GitHub Desktop or download the latest source code from https://github.com/wled/WLED under theCodedropdown menu as a .zip file.) Alternatively fork the WLED project first and download it from your fork.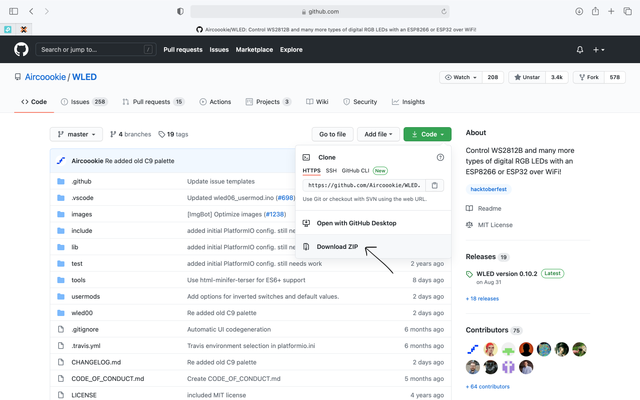
- Go into the WLED folder by executing
cd WLED. - Install all dependencies by executing:
npm install
Installation guide (PlatformIO, recommended)
- Download and install the free Visual Studio Code by Microsoft.
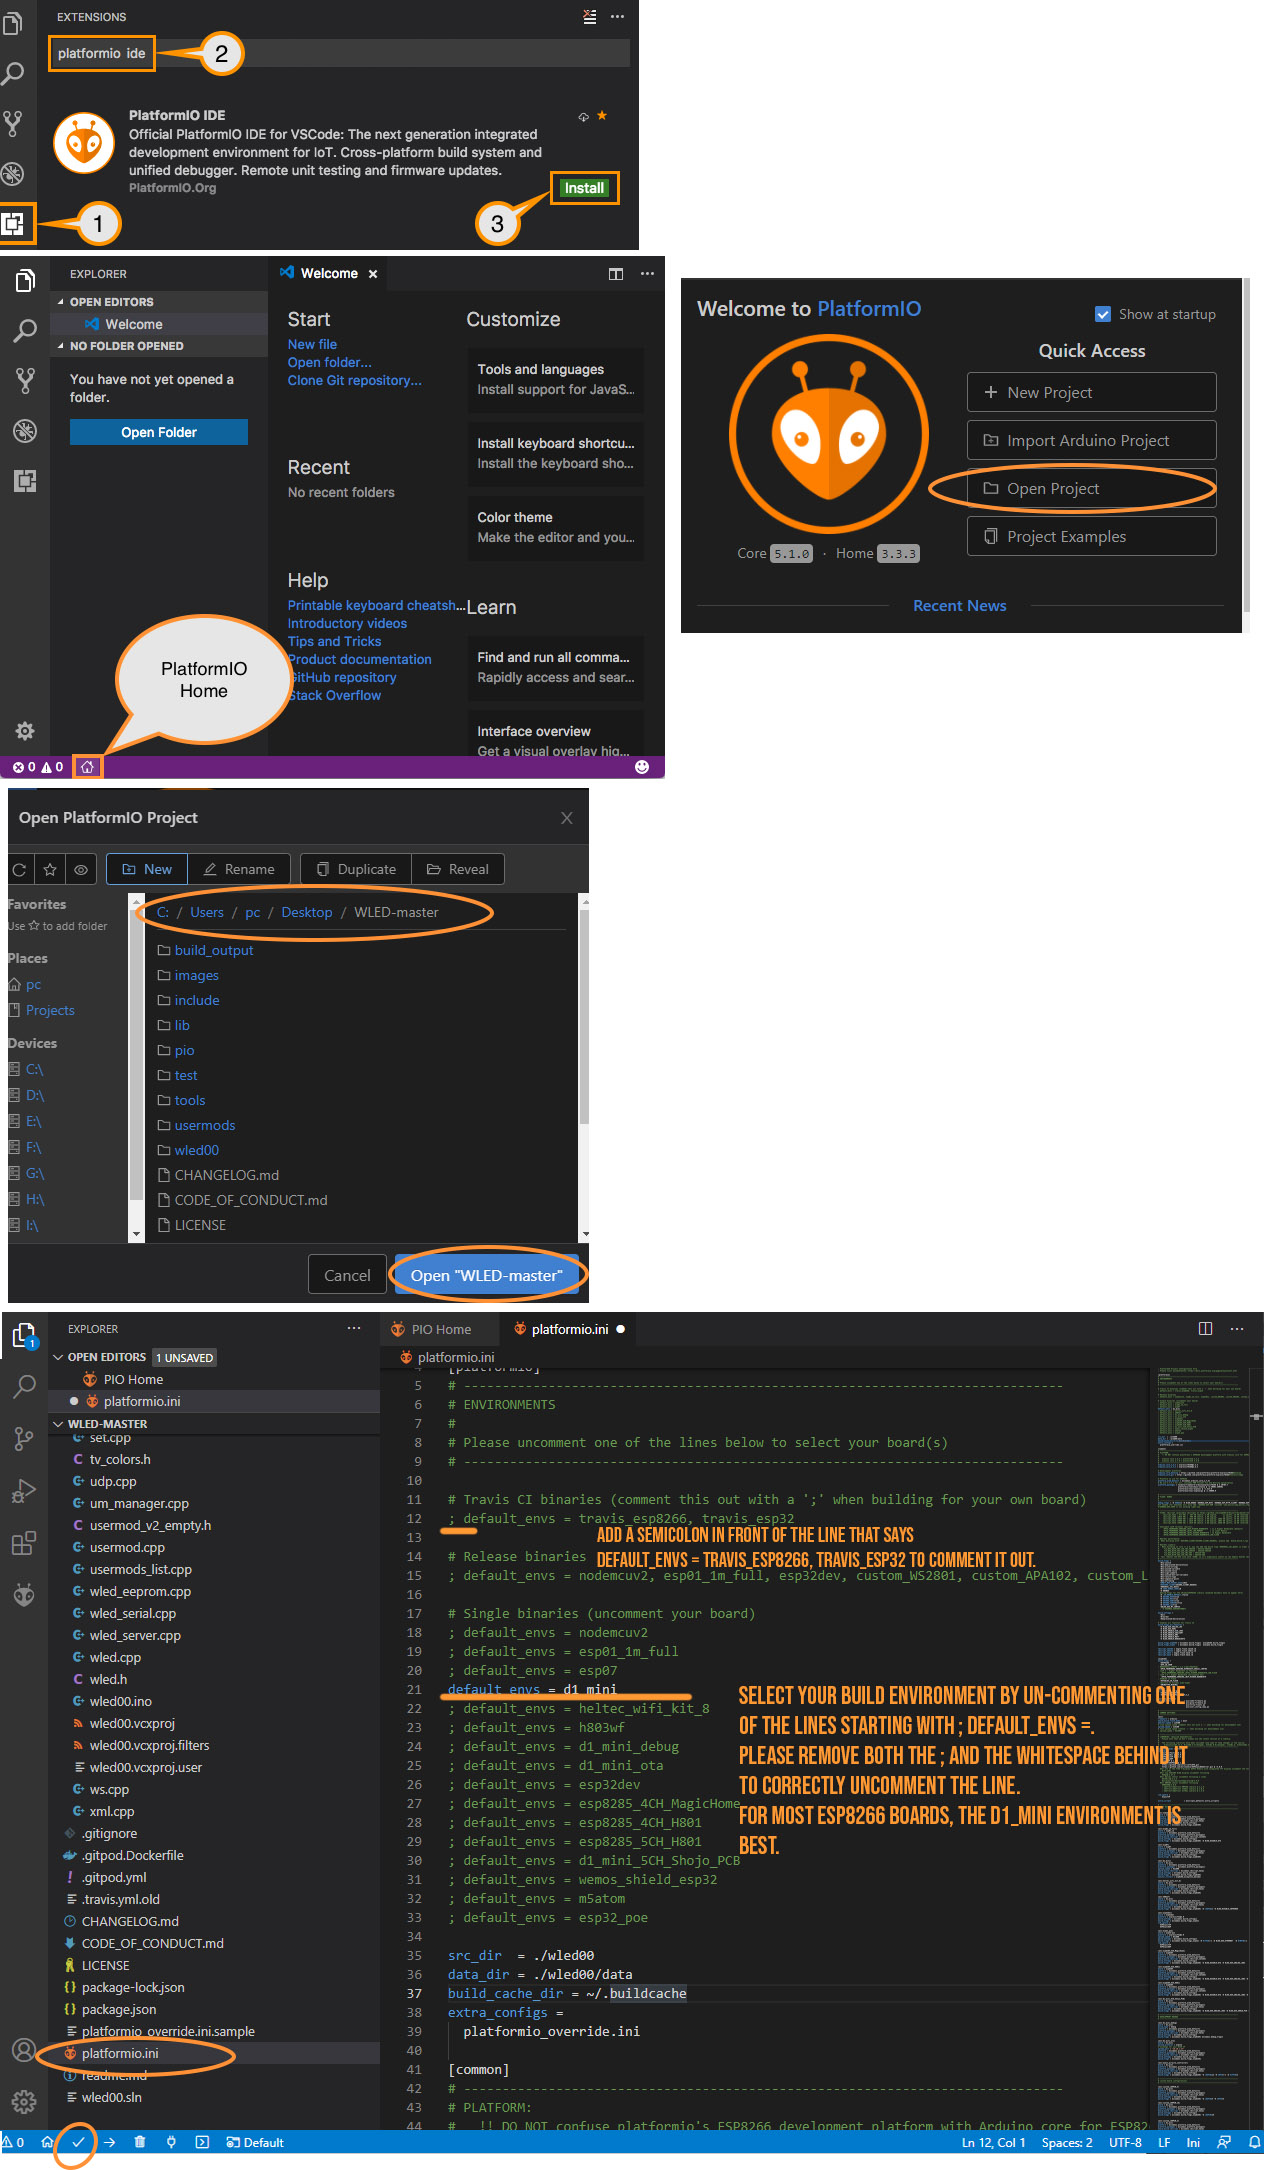
- Open VS Code and go to the Extensions manager (the icon with the stacked blocks in the left bar)
- Search for
platformio ideand install the PlatformIO extension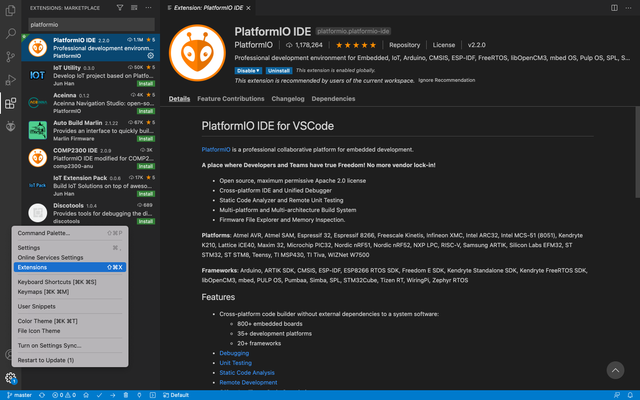
- In VS Code go to
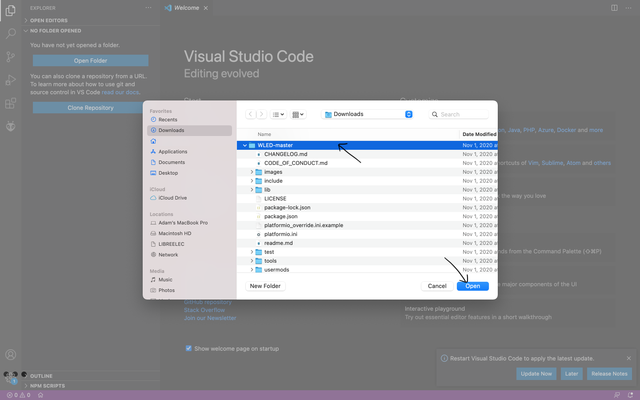
File -> Open Folderand open that root WLED folder (the one that containsplatformio.ini, NOT thewled00folder)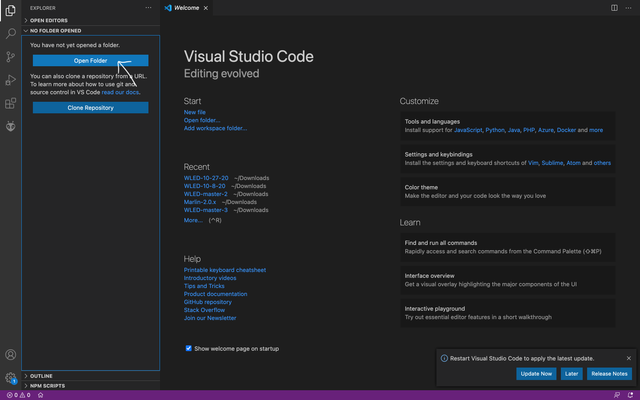
Compilation guide (PlatformIO)
Tip
Make sure Git Client is installed on your system. You can get it here.
- In VS Code, open the file
platformio.ini. - Add a semicolon in front of the line that start
default_envs =to comment it out. - Select your build environment by un-commenting one of the lines starting with
; default_envs =. Please remove BOTH the;and the whitespace behind it to correctly uncomment the line. For most ESP8266 boards, thed1_minienvironment is best. - In the blue bottom bar, hit the checkmark to compile WLED or the arrow pointing right to compile and upload!
Success!
If you get one of these two errors, hit the checkmark icon once again to compile and that time the code should build without problems!
error: wled00\wled00.ino.cpp: No such file or directoryFileNotFoundError: [WinError 2] The system cannot find the file specified: '[...].sconsign37.dblite'
Making a custom environment
Once you've confirmed VSCode with Platformio is set up correctly, you can add/define overrides to allow you to use non-default pins, add a usermod, or add other custom features.
- Copy and paste the contents of
platformio_override.ini.sampleinto a new file calledplatformio_override.ini. Make sureplatformio_override.iniis in the same folder asplatformio.ini. - Replace the line
default_envs = WLED_tasmota_1Mwith the line you uncommented inplatformio.iniin the previous steps (from Compilation guide (PlatformIO)). Example:default_envs = d1_mini - In
platformio.iniscroll down until you see#-------------------- # WLED BUILDS #-------------------- - Find the section that matches the build environment you selected in previous steps. Example:
[env:d1_mini] - Select the whole section (including the first line in brackets [ ] ), and copy and paste it into
platformio_override.inioverwriting the build environment section that was already there. - Add a new line under the line that starts with
build_flags = - Put your
-Doverrides on this new line, giving each-Dit's own new line. - Compile your freshly customized WLED image!
Adding usermods
To include one or more usermods in your build, add a custom_usermods line to your environment in platformio_override.ini:
[env:esp32dev_temperature]
extends = env:esp32dev
custom_usermods =
  audioreactive
  Temperature
Each name corresponds to a folder under usermods/. No other file editing is required — usermods self-register when compiled in. For full details, including how to add external usermods from a git repository and how to write your own, see Custom Features.
Flashing the compiled binary
Tip
This step is optional and only recommended if you want to install the same binary to multiple boards. For testing, it is easiest to upload directly from PlatformIO
The .bin file is located in the subfolder /build_output/firmware in your WLED folder. The binary will have the same name as your environment.
All that's left to do is flash this .bin file onto your ESP board and then connect it to WiFi.